


Make it Monday is a Feature Post designed to showcase things we’ve made. Granted it’s not particularly bookish, but creativity is a fantastic outlet! In these posts there will be DIY items, beauty items, crafted items or even baked items, a lot of which will be pinterest pins we’re trying out. We hope you enjoy these posts, if you have any suggestions please feel free to leave a comment! And if you’d like to join in, please just link back to our blog. Thanks!
Some of these have been building up on my pinterest lists, but recently I decided it was coming to the time of year when you realise hair is HOT and it needs to be pinned up, so it only seemed fair to get around to making some of these. Some are easy and need no explanation, some hair grips and some nail varnish, or some clips, buttons and a glue gun/superglue.


I was going to make some of these, but at the moment my hair needs functional clips when up, not decorational. I’m working on this of course, but it can only grow so fast. Plus, the bumpy side of the clip is meant to be down, but my latest batch has a curve the wrong way…helpful I know.
I did however try out THIS one:

This was a hard one, possibly because my clips are curved? Maybe my wire is too thin? Who knows. This is how I went about it:

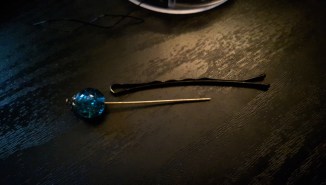
I gathered what It looked like I needed and put them together. First I tried trimming off the long part of the pin and making a loop, like I did in my last Make it Monday HERE. But in the end I just wrapped the long end around the top of the pin and hid it with the black wise to match the clip. Perhaps I didn’t wrap the wire down far enough? In any case I find these quite odd as this clip is designed to go in sideways. Perhaps when my hair is longer and hair pins are finally possible to use, I’m deccorate some of those, that seems a far better idea, especially as they go DOWN not sideways.


Which brings me to the successful part of my post. Hair Combs! I made two types and I actually really like them, which is odd because these combs were what my mother used a lot while I was little and to me they’re ‘older people’ things. Luckily she had some still lying around! First I decorated a pair with fabric:

This is the pin I found and I pretty much followed it:


Obviously you need some combs and some fabric of your choice! I chose this one because my hair is pretty dark and this fabric is decidedly not. Plus it’s pretty.


You weave it into every other gap until you get to the end then you weave back again. I didn’t knot the start so when I got back up to the end, I made a bow! First it was too bit, then only one of the two looked pretty, so I just knotted off the other and gave it no bow.

Then I made the thread comb.

I did it differently to this pin however. The holes in the prongs of my comb didn’t go all the way up as the ones in this seemed to, so I improvised.


Obviously, you need some embroidery thread and some combs! I chose these over the others because they had a pretty wavy top which would have been lost under fabric. I held one end of the thread on the back and started wrapping it around.


I’d recommend doing all the criss cross ones first – the ones to hide as much of the top part as possible, then go over them with straight ones to make it look pretty. I didn’t quite get this till I was working on my second. I also couldn’t get right to the end as the edges were curved, but as my hair is dark and the combs are dark too I dont think this will be an issue. If it is for you, you can wrap some thread around from left to right and hold it in place with glue if you wish. I, did not.


When I changed the colour, after 3 gaps, I did it the same way I started, I also didn’t cut and knot the last colour, I decided that it was quicker and easier to have the length under the rest of the wrappings. Also prettier as there were no knots to hide. Once I’d done with my 3 colours (the middle being smaller because I didn’t think it through) I switched back to the second colour to make a pattern. As I hadn’t cut the end it was simply a matter of switching lengths.


When I got to the last colour, I didn’t hold the other two lengths under the wrapping but kept them put. Then I made sure when I wrapped the end, to finish next to the lengths of the other two colours so I could knot them all securely together.

CONCLUSION:
Pretty pleased with the combs. I look forward to working out how to wear them. It’s a great was to upcycle something that some (like me) may perceive as ‘old’. The wired clip? I don’t think it was a success…I didn’t like it and I wont be making more that way!

