


What else do you do when completing the Harry Potter films with a fellow [book] Potterhead but make wands while you watch?!
This wasn’t really from a specific pin, but here are a few inspirational how to pins and links:


I periodically meet up with a friend (who incidentally also has a Voodoo I made her, called Trubl) and we get upto all sorts of shenanigans together. This meet up, she’d finally decided to finish off the HP films and we also had our relevant house P-jammy-skins on so we decided to make ourselves our very own wands. (I was also required to make my brother one… )
In a fit of genius we decided to find out our wand stats from Pottermore cause it’s been YEARS since we ‘got’ them therefore we didn’t remember, which, if you’re interested, shows up on your ‘profile’ section.


I’m the Ravenclaw with the English Oak wand, but I decided that wasn’t an accurate depiction of English Oak, my old oak floorboards being a lovely dark colour, Trubl is the Hufflepuff with the Ebony wand, but she wasn’t a fan of the dark wood and my brother is the Slytherin with the hawthorn wand, but he didn’t get a choice because he wasn’t there. (shut up, I tried.)
First things first, you’re going to need to arm yourself. Useful tools of destruction include:
-Chopsticks (Or, rolled up paper! Who knew?)
-Card scraps
-Masking tape
-Glue gun and large amounts of glue sticks
-Beads of various shapes sizes and textures
-Other decorative items
-Sand paper
-Scissors
-Craft Knife and mat (and someone responsible to wiled them if necessary)
-Paintbrushes
-Paint
-Some form of cup (to stand the wand in as it dries)
-A3 card (for boxes)
-Ruler and pencils
-Double sided sticky tape
-Reference pictures

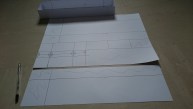
Having decided to make our ‘actual’ wands, we discovered pretty quickly that our chopsticks were not long enough, so using clever means (a ruler, scrap card and masking tape) we extended them, giving them handles. This is an inexact science and we forgot to take into account that we wanted to stick stuff on the ends and that this might take more glue than we accounted for (or we were simply glue-gun trigger-happy). The lengths aren’t far off and we were comforted by the fact Mr Malfoy had added a handle on his to enable him to hide it in a cane, thus allowing us to conclude that perhaps people added things to their wands once they owned them. And why not?! I guess it’s like adding a case or a charm to your mobile phone, which means that the accidental extra 1/4 of an inch here or there makes no nevermind.


Trubl decided to cover hers in masking tape because she could, I decided to sand mine round because I liked Luna’s wand the most of the ref pics and to mostly leave my brothers alone (but I did later return and sand it a little rounder so that it looked less like a chopstick with a fancy end…).
Then it was time to add the glue! Please note, glue-gun glue can be HOT ( we’ve found this out the hard way) and it’s generally advisable for persons of a younger or shakier nature to seek the help of a more responsible person. It’s also worth working out some idea what you want to do before you start applying the glue, cause it’s a little late then and you might accidentally turn your wand into a ferret or something. Hence the mention of reference pictures. You can find these all over google and pinterest.


At this point we took some time about our work, it’s a lot easier to add extra glue than to remove it because generally removing it involves a craft knife and you get squared off edges and flat bits, which is fine if that’s what you’re after, but I’m all about the curves. I think I was still sanding my wand down out the window when Trubl got to this point, so I didn’t see exactly what she did, but she used the glue to add definition to everything she smoothed down with the masking tape as well as to add some charms to the handle. For my brother’s wand I added three green beads to the bottom, getting them to stay was hard, I had to build the slim bottom out with glue because I hadn’t thought it through. The I just sort of swirled the glue up to the edge of the handle and added a double lip. I smoothed and cut bits so this didn’t turn out as elegant as it could have, but hey it’s a boy’s wand, they don’t always want elegant, sometimes they want tough. Then for my wand I added a bead at the end and a sort of double lip where the handle met the rest of it and then I made vines and leaves. Three leaves to be exact, mainly because I have no idea how I managed to get it so delicate and perfect, I didn’t want to mess it up, though you can sort of do a blob and go back with a craft knife to shape it. I wish I’d done more but clear on white is hard to see and I was making two wants so I was a bit bored of glue by then.
Trubl says that in hindsight she’d perhaps use less masking tape and more glue, because her wand is covered in lines from the tape, as is my handle. I would perhaps next time cover the handle with a vertical strip so that there was one line instead of wrapping it horizontal again.


Next it was time to paint them! you might want to have some idea for this too. Trubl got this right, she had an idea and she went with it, I think both my brothers wand and mine have been at least 3 different colours each. (Mine – pale, mainly an under base for the length of the wand so that a watery coat or two of paint would give it a wood grain affect, Grey handle and then finally dark brown handle, Brothers – pale, pale and black, black, brown and silver) At this point, we realised and instantly regretted that we hadn’t added anything to represent our wand cores before we glued up our wands. We could have added red thread or silver string or a feather (depending on your core of course, no point adding a red feather if your wand is unicorn hair)!
This process took far longer than it seems, with so few lines about it so I’ll add a little insight. I learnt that the detail is not always the last thing you paint. At the time my wand had a grey handle and I was painting my vines bronze, very carefully. I wiped up the excess as best I could, but I discovered when I decided to make the handle dark brown that it was easier to paint the brown over the bronze to hide mistakes. I spent about 20 minutes with both paints at the end switching between the two to get it perfect, because I could dammat.

I had to mix two ‘bronze’ paints together to get the colour I used, one was quite gold and the other was rather in your face. I used 2 parts ‘gold’ to 1 part ‘in your face’ give or take. also, fabric paint might work on other mediums but GLUE is not one of them. Just saying. Also, while I was making TWO, count um, TWO wands and TWO boxes, Trubl was making one, so while she completed everything in the precious time we had together, I did not. So, I had to finish painting mine at home.
And then it was time to varnish them. Trubl had chosen ‘shiny varnish’ which turned out to actually mean ‘glittery’ which was spectacular. I chose ‘satin’ and ‘matte’ because I like matte, but then I thought that glassy would have been more ‘wood-like’ . However when it actually came to varnishing time I ended up using the matte for pretty much everything. I used the satin on the wands handles but then put a coat of matte over to try and tone down the shine, not so much. Hopefully another coat at a later date will give it the affect I was after.


BOXES! So while parts of our wands were drying or while one of us had the glue gun (or was hanging out the window with sandpaper and a chopstick) we cleverly used the time to work on the boxes. BUT before we started the painting, we drew wand templates so that we wouldn’t keep having to harass our drying wands to check they’d fit. Both the length and height of the wands too, boy weren’t we clever.

What I’d taken with me as possible bases were no longer appropriate because we’d extended our wands by roughly 3 or 4 inches. One of the bits I’d taken was the right length for my brothers wand so I used that for the base and made a lid out of card. To get it stiff I had to reinforce it with a second layer or card, which I hadn’t realised so I hadn’t made the lid big enough for the second layer of card so that’s a little of a tight fit. Mine, being the longest wand, was totally difficult and I had to make separate ends to be added with tabs, but having learnt from the first time I made allowances for everything. Trubl made her box first and didn’t seem to have much trouble at all, except she realised she should have stuck the tabs on the lid between the two layers of card (which I then made sure to do on mine) so that the lid is smooth, unlike the bottom of mine where you can see the tabs. But we’ll cover that with tissue paper later.

Having studied Ollivanders, we saw that not all the boxes were the same (thank goodness, as we had 3 different ones) so we were happy about that, but we painted them all. Nic painted hers the same colour as her wand a mix of brown and metallic brown, my brother’s gained a white bottom and a brown lid and mine is the same colour as my wand. You can make them out of coloured card or cover them with paper too. Then we varnished them to see if they would seem more ‘woody’. Not so much, but whatever. We also added numbers of identification on the sides like Ollivanders had. We picked random numbers, but we really should have conspired and tried to invent a system by which we worked out what numbers were going to mean what and then had them all have at least one matching number, since all three had dragon hearts. But never mind!
Add a little tissue paper in your chosen colour, (Trubl chose yellow because it was first, but I deliberately chose blue and green to continue the accidental match ups) and bob’s yer uncle! you have yourself a fancy wand and box set!


(If there is anything else you’d like to know about our wands or if there’s anything I missed [terribly sorry, I've been writing this post over a week and it's now rather long] or if you’ve made your own wands, please comment below and let me know!)
CONCLUSION:
There’s just enough Harry Potter in the films to make you want to watch actual Harry Potter and thus have to resort to re-reading the books again for the actual wonder that is the sarcasm of Harry, Ginny and Ron because film them somewhat fail in being as fantastic and did you really have to miss out so much of the humour and actual plot and replace it with out-of-character drivel? [DIDYOUPUTYOURNAMEINTHEGOBLETOFFIRE?]
(Though recently I’ve learnt some pretty interesting things about Alan Rickman’s Snape that needs re-watching. Did you know he knew his entire plot line before filming even started?!)
Also, everyone is getting wands for Christmas.
Swish and flick.

